Last week was my quilt group's meeting. Every year the committee put together an annual programme and they're always looking for members to do demos or run workshops. It's a few years since I volunteered so, this time, I offered to run a workshop on mug hugs - a little cosy to keep your tea or coffee warm in the winter.
To give me plenty of time, I asked to be put on towards the end of the year. It therefore came as a bit of a surprise when I found out just before Christmas that I'd been pencilled in for February! I hadn't even made a mug hug at that point. Gulp!
After a few deep breaths, I made a couple of prototypes. The problem with ones you can buy in the shops is that they're usually far too big. They come right up to the rim of your mug so that you get a mouthful of fuzz every time you take a sip. I designed mine to be lower and only provide half a hug - decorative but still cosy.
Originally, I planned to use ribbons as the fastening but they were too fiddly to tie and I thought they'd keep getting in the way of the handle. I'd used loops and buttons on my coffee pot cosy so I tried something similar with hat elastic. Perfect.
As we were going to be sewing during the meeting, the design needed to be simple and able to be sewn by hand in about an hour - well, at least part of it. It was an easy decision to choose felt as the main fabric as it doesn't fray and is nice and woolly and warm.
I played around with a couple of ideas. First was a simple striped design using the stitch and flip method. A strip of rick-rack and more felt tidied up the raw edges. This is my friend's favourite.
Then an even simpler idea with flowers and a fancy trim. The flowers here were ready-made but would be easy to replicate. This was the design I decided to use as I also wanted to make up packs of materials for the group and this was the easier option.
I made up 20 packs with all the materials to make the mug hug: this worked out at about £1 per pack. There was a choice of either pink or purple (the back and the ribbon) and I included 10 different squares of felt so that they could choose which to use for the flowers. The trickiest part was counting out 25 seed beads for each pack - thank goodness for tweezers!
And how did it go? I thought it went really well. I had all my step-by-step samples and some other ideas from magazines and the internet. Everyone seemed interested and they laughed in the right places, always a good sign!
In the end, most people chose to take a pack away rather than sewing during the meeting, though a few did cut out their flowers. I can't wait to see the finished mug hugs next time.
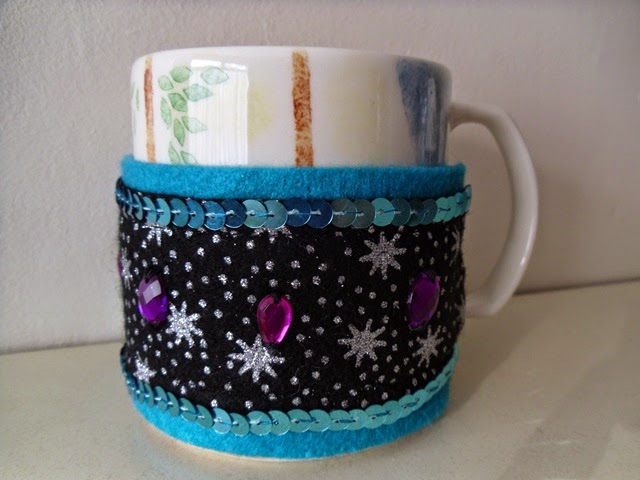
It's such an easy pattern and can be decorated lots of different ways. This is Chickpea's version, all sparkle and bling! If you'd like to make your own, here's how...
To make a mug hug, you will need:
2 strips of felt, 2.5" x 10"
Scraps of felt for the flowers
25 seed beads
2 x 5" lengths of hat elastic
2 x 10" lengths of ribbon
2 buttons
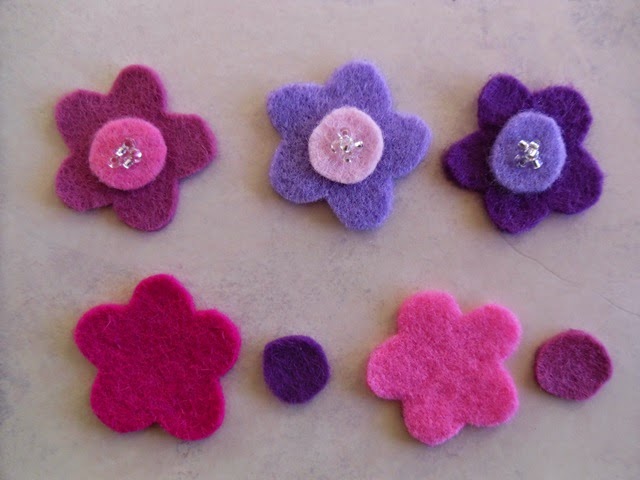
Make 5 flowers: each flower contains 1 flower shape, 1 small circle, 5 seed beads. If you don't have any beads, you could just use small buttons as in the example below.
Sew the flowers to the grey strip of felt, leaving a 1" space at one end for the buttons and a 1/2" space at the other for the elastic loops.
Sew the grey and coloured strips together along 3 sides, leaving the side for the elastic open.
Make 2 loops with the elastic - make sure the knot is near the end. Insert in the end of the mug hug.
The knot needs to be inserted far enough so that you can sew 2 rows of stitching in front of it. This part is definitely best done on a sewing machine to make sure the elastic is firmly secured.
Sew ribbon along the top and bottom edges. Then sew on the buttons.
Attach to your mug and enjoy! I'd love to see your version if you decide to make one.
It's been a crafting week as it was also the first meeting of a knitting and crochet group at work. Everyone had a great time oohing and ahhing over each other's projects so we're now planning monthly meetings.
I've also been working on another project and will share that with you next time. Enjoy the rest of your weekend. xx


They're great - glad it went well!
ReplyDeleteWhat a brilliant idea and so useful.; I'm so pleased all went well.
ReplyDeleteluv
irene
xxxx
Oh, a MUG HUG, I love it and I love the name too.
ReplyDeleteDon't know if I could make them as perfectly as yours are, they are lovely!
xx
These would be great here this week as we are getting an Artic Blast!
ReplyDeleteLove the colors. The pink one is up my alley and I totally see Chickpea in hers :)
Will have to share this with Cat as it is simple enough for a 5th grader to do.
They are fantastic Julie! I like the way you have designed it so only half the mug is covered as I have made a knitted mug hug before and a mouthful of wool is not tasty with your cuppa! Beautiful colours you have used and thank you for sharing your tutorial so we can all make one too.
ReplyDeleteMarianne x
These are brilliant and well thought out. I always suffer with some thread or fluff after drinking. I'll save this so I can make one too. Take care xx
ReplyDeleteLovely idea, and great for presents. I think these lower ones are better than the big fuzzy mouth ones xx
ReplyDeleteThey look wonderful Julie, very pretty and would make a great present.
ReplyDeleteAmanda xx
Your mug hugs are great! I think that making them not so tall is a great idea as I made one last year from a kit and it is way too tall so you get a mouth of felty fluff which is not nice! It is now round the pencil mug on my desk, so it worked out, but wold have been much better if it had been shorter! What a clever lady you are to design these! xx
ReplyDeleteI had never sen these before - they are so clever - and much better than the ever popular mug rugs - which do nothing to keep you tea warm. I love all the different ones - and surprisingly I have enough supplies on hand to make some - great winter project and finally a clever idea that is good enough for a gift.
ReplyDelete